The cast iron mains replacement technique that offers maximum operational flexibility with the ability to upgrade the pressure.
Live Mains Insertion is similar to dead insertion of polyethylene pipe (PE) into a cast iron main with one very beneficial difference. By using a special gland box, the old main is kept live throughout the insertion process and can therefore maintain gas supplies to customers via the annular space until it is operationally convenient to transfer the services to the new PE main.
Live Gas Main Insertion Technique at Unitil
Applications
- For insertion of PE into 3″ to 16″ cast iron pipe
- Wide range of PE/cast iron diameter combinations possible
- Suitable for low-pressure systems up to 1 psi

Benefits
- Cost Saving: up to 14% compared with dead insertion; up to 38% compared with open trench replacement*
- Health & Safety: minimum number of excavations open at any one time
- Environmental Impact: low-dig, trenchless technique
- Customer Relations: minimum time off gas for customers with a one time service renewal and minimum disruption to traffic
Operational Advantages
- Services can be transferred to suit labor and customer availability
- Only one purge and re-light per customer – no wasted fittings
- Two pushes can be carried out from one excavation
*Research in the UK has found that in the replacement of the most common pipe diameters (up to 6″/150mm), where the insertion is at least 150 m / 492 ft in length, live mains insertion is more cost effective by between 5% and 14%. Statistics from the US show that when compared with open trench mains replacement, live mains insertion can save between 30% and 38% of cost.
Background
The technique was originally devised by British Gas in the early 1980s and was then known as the Blackburn Method. Steve Vick International took over commercialization of the system and, together with Gaz De France, further developed it with the Lyontec disposable gland box. It has been in continual use ever since with over 3,100 miles inserted in the UK alone. The system has been adopted throughout Europe and the Far East and a number of projects have been done in the USA, where it is sold through PLCS Inc.

Equipment & Consumables
PLCS supplies all the hardware, application equipment and resin kits required to carry out Live Mains Insertion. The foam sealants for use in Insertion Seals and End Seals meet all necessary specifications. The use of pipe pushing machines and coil pipe trailers are necessary for the safe, efficient implementation of live mains insertion. These can be rented or purchased from PLCS.
Applications
Although primarily used to replace and upgrade cast iron mains, live mains insertion can also be carried out on ductile and steel mains by using a window cutter to expose the PE at the service cutouts.

Pipe Size Combinations
A frequently asked question about Live Mains Insertion is whether the annular space will be enough to feed the given number of customers. In fact, the capacity is more than adequate in most cases. For example inserting 2″ PE into a 4″ main leaves an annulus equivalent to a 2″ diameter PE pipe.
Ask for a copy of the matrix that gives the capacity of the annulus expressed to the nearest PE diameter equivalent.


Hydraulic pushing machine

Cured Insertion Seal Foam after breaking out the main
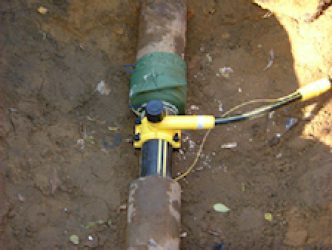
End Seal for service
General Outlined Procedure for Live Mains Insertion
(This procedure is only a general guide. Always follow your company’s Standard Operating Procedures)
Prepare for Push
- Install and commission by-pass
- Insert Flowstop bags
- Cut out section of main between bags
- Cap off end of main not being inserted
- Fit Lyontec gland box assembly
- Install pushing machine

PE Push
- Fit Pressure Tight Pipe Puller
- Push PE pipe into gland box until it pierces membrane
- Remove Flowstop bags
- Push PE to required length for entry into second excavation
- Foam off annular space near to end of PE at 2nd excavation
- Install Flowstop bags in cast iron pipe and cut out section of main between
- If one-way feed, a second by-pass must be installed here

Complete PE Push
- Remove Pipe Puller
- Install End Seal kit on broken end of cast iron and PE
- Connect PE to new or existing main and purge PE.
- PE may be capped depending on circumstances of job
- Lyontec gland box is left in position to seal the insertion point.
- Plug holes and Back Fill

The project can now be left for several days or even weeks until operationally convenient to transfer the services.
Transferring the Services
- Service transfers usually begin at the service furthest from the gas supply and proceed towards it.
- Excavate first group of services
- Remove existing fitting and install foam injection kit
- Inject Insertion Seal foam following instructions

- Test foam has made a good seal at second service position
- Remove old section of main at that position and transfer service

- On completion of transfer fit End Seal Kits on both sides of broken cast iron main between the service tee, as shown here.
- Backfill
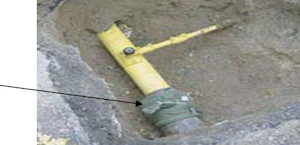
Transferring the Services
Lengths of inserted main should be carefully measured so that the position of the end is known. Foam is injected into the annulus near to the end (picture). A section of the cast iron main is broken out to recover the end of the inserted PE. The transition tie-in process can now begin. For two-way fed mains, a bypass must be set up between the old and new mains.
Each project is unique with many variations of the tie-in process. PLCS is available for technical assistance.

Live Mains Insertion Field Pictures
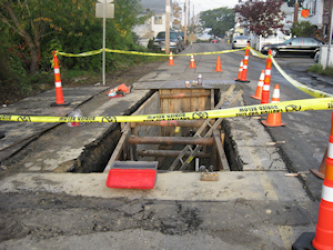
LMI Job site

Tightening Entry Gland

Entry Gland
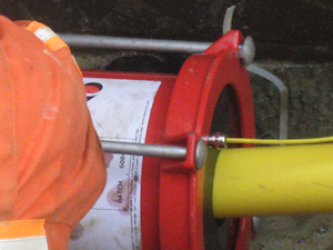
Entry Gland Includes Tracer Wire Gland
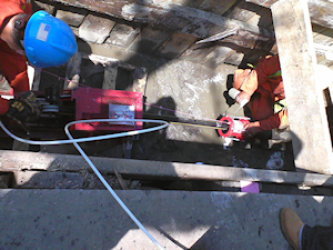
PE Main Push Using Pushing Machine

PE Main Push Using Pushing Machine

Typical Entry Excavation with By-Pass

Typical Entry Excavation

Entry Excavation
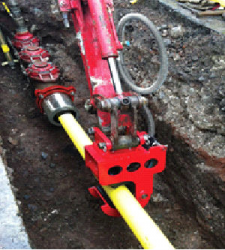
Main Push using PE Pipe Handler
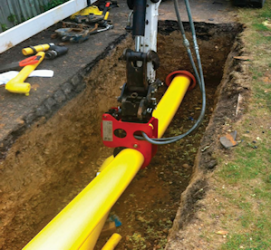
Main Push using PE Pipe Handler

Foam Off at Entry Excavation

Setting Up Insertion Seal Foam-Off Gun

Insertion Seal Foam-Off
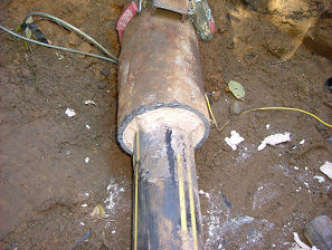
Completed Foam-Off and Cast Iron Host Removed

Completed Push at Exit Excavation

Completed Push at Exit Excavation

Completed Push at Exit Excavation
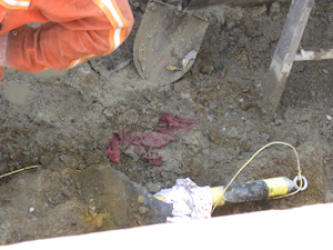
Completed Push at Exit Excavation

Completed Foam-Off and Endseal

Cast Iron Host Safely Removed with Pipe Cracker

Cast Iron Host Safely Removed with Pipe Cracker

